Tuesday 4 May 2010

ATTENTION PLEASE BEFORE VIEWING .....

I'll be handing in my Final Major Project tomorrow. At this moment, I feel like one of the characters in my zombie trailer, without the blood!

What I will include:

Final film trailer, 'Payback'. Edited by Stephanie Bourke
A blog displaying my Reflective Diary

In Appendices:

Directors cut of the trailer
Final edit of Directors cut
Final Images of Trailer Designs
Printed copy of Reflective Diary
Sketchbook of Designs

I request for my Trailers to be viewed on a good quality projector with high volume and dimmed lights to improve the intense atmosphere. Thank you.


My Reflective Diary blog shows some images that relate to what I am writing about, however I've decided to include my 'final designs' in a separate appendices along with both versions of Anthony's cuts of the trailer so that they are easier to be viewed and referred to.

Click on the link below to view the three zombie trailer versions such as the Directors cut, Final Directors cut and The final zombie trailer edited by Stephanie Bourke.

http://www.youtube.com/user/HayleyGittins


I hope you enjoy it...

Sunday 2 May 2010

Final Trailer

Today I picked up both trailers, from Steph and Anthony, which I'm extremely pleased with, especially Steph's.

Final Trailer: I like the way it tells the story and focuses on the make up, and at the same time makes your heart race with excitement. It ticks all the boxes on the brief exactly as I intended. It showcases my make up really well, in a visually entertaining way and in keeping with the zombie theme. In producing this trailer I've learnt so much from being involved in the whole process of making a trailer from start to finish, and in doing so learnt a great deal about film production techniques from having to do it myself, such as filming, lighting, camera operating, editing, organisation skills as well as working as part of a team and creative thinking. Throughout this process, I have also come a long way in fine-tuning my skills as a make up designer. These are all skills that I intend to build on and will apply to work in the film industry, when I finish, which is the path I wish to take. Undertaking this project and working as part of a film production team, has made me even more determined to pursue a career in this area of the industry.

I have also really enjoyed the editorial aspect through practicing all my shoots and have undoubtedly improved my photographic make up skills. This has also given me an eye for detail which is especially vital on still photographs as every fine detail shows up and has to be absolutely perfect. I have also learnt that you must look out for these minute details like wayward hair, or shiny skin, from behind the camera as often the photographer doesn't see them at the time. As a make up artist I have learnt that you work with the photographer to get everything as near to perfection as possible, as re-touching afterwards is time consuming and expensive.

I've also learnt how to be really quick with make up both for photography as well as film. I had a restricted time of 20 minutes per zombie when we shot the trailer, and in industry speed is really important as you don't want everyone on set to be waiting for the make up artist.

'Payback'

I decided to call my trailer 'Payback' as I wanted something that was going to short and snappy and something that would relate to the trailer.

Payback Definition:

1. The act or process of paying back
2. A benefit gained as the result of a previous action

Both these definitions of the word 'Payback' are evident within the narrative of my trailer. In the directors cut you see Anthony putting money back in the till which is a form of paying back. He is warned that if he doesn't put things right then he will have to suffer the consequences, which in other words means he will have to pay for what he has done.

In Steph's trailer edit, 'Payback' isn't an obvious connection as her trailer edit doesn't follow a strong narrative but shows 'payback' more visually as at the beginning Ant takes a pill he thinks will allow him to do whatever he wants, there's 'payback' as more zombies start to appear.

Its all about the 'payback' he receives for doing a deal with the 'dark side'.

It is an enigmatic word that doesn't give too much away, and as it is only a one word title, is quite punchy.

Thursday 29 April 2010

Music for the trailer

Anthony's cut:

I didn't like his choice of music; he edited the first half of the trailer to the song Woo hoo by Blur!! Although the lyrics and beat went with the storyline of Ant's character racing round taking money, stealing cars and laptops because the city was frozen and he could do what he liked, I found the song too 'cheesy'. I wanted music without lyrics as I feel they distract from the visual content. Therefore, I have been trying to find suitable music. I want something upbeat to keep the underlying tension going and something that gives a strong beat relating to a heartbeat. This will pre-empt the shock of the first zombie appearance. Then the music changes, and I've chosen a steady drum beat to build the tension even further to fit the horror genre.

Steph's cut:

I have been up all night trying to find music for Steph's version of the trailer. I have looked at electro, drum and bass and dubstep as they have strong underlying beats which works well for creating tension. I have looked at artists such as The Prodigy, Fake Blood, Plump Djs and Subfocus. However I have decided to stick to the genre Dubstep as it is a unique sound described as 'tightly coiled productions with overwhelming bass lines and reverberant drum patterns'. It is gives an intense vibe to the sound and I can relate it to horror because of the increasing drum and constant beat building to a climax and a sudden beat drop, that creates a similar sensation to a fast heartbeat.

I found the most intense and heavy dubstep I could find and listened to a selection from 16 Bit who produces music that has a hardcore beat. I used 16 Bit's 'Chainsaw Calligraphy' in my dissertation horror clip which worked extremely well, building up the shock and horror factor.

Here's the shortlist sent Steph. These are the ones that I think would fit the best:


Machine Gun (16 Bit remix) - Noisia

Thieves - Self Similar

Stuck in the System - Joker

Demolion - Goldfinger

Mafia - KOAN sound


Note: I really wanted to use 'Chainsaw Calligraphy' - 16 Bit as it is really scary because they use the sound effects of a chainsaw, which somehow you automatically associate with murder! However I have already used that music before in my dissertation clip and because I will upload both onto my website in my next project, I don't want to use the same thing twice.


Wednesday 28 April 2010

Editing Meeting

Anthony is finally back, and today we had a meeting with Steph to view Anthony's directors cut, and discuss what we liked, and what could be re-edited, and to discuss how Steph's version will differ to Ant's. Somehow Ant wasn't able to send the footage over to Steph via 'you send it' so we had to upload it, then transfer it onto Steph's hard drive. She will then edit another version of the trailer showcasing my make up with a totally different style, so I have a contrast between the two. One will be a traditional trailer for a film, and shows key points of the story to draw the viewer in and make them want to watch it. It also gives an idea of the genre of the film and the viewer an idea of what they can expect the film to be roughly about. The other, edited by Steph, will showcase the make up and is to be geared towards an abstract interpretation of the trailer, collaging shots of imagery to shock the audience. Intense music will get pulses racing, and the trailer is intended to be a tense journey of emotions for the viewer, from fear right through to a visual spectacle.

I will be handing in Steph's version of the trailer as we have edited it in a way that not only showcases my make up, but is a far more edgy and contemporary than Anthony's cut. Anthony's trailer cut is longer than Steph's however hers is more to the point and contains exactly what is needed in terms of make up. I have researched other trailers to see their time duration such as 28 Days Later at 1:28, Shaun Of the Dead at 1:39 and Creep at 1:46. The majority I have looked at have been between 1 and 2 minutes therefore Steph's cut fits within the average trailer time.


However I will include Anthony's directors cut version, to the appendices to show that first edit, as it still meets my brief and satisfies my target market. I also worked with him on a final cut which I will also include to show the changes between them, and also to show the contrast between Anthony's final cut version and Stephanie's version.


Monday 26 April 2010

Editing with Steph..

I attended the edit with Steph as much as I could, to give my input. We used final cut, which is what most editing post houses use. It is valuable for me to understand how it works and familiarise myself with the programme in case I ever need to use it in the future.

We went through all the clips to sort them into sub menus such as Zombie/London/Ant and Jeremy folders.

We marked any good or bad takes.

We mapped on paper a rough storyboard to get a whole picture and structure.

I will need to finalise the music, and lay it down so we can cut images to it as it makes it easier to pace the project. Its easier to mix the music in final cut, two mixes of the same track mix in better when you want a faster pace.

We made a different folder of voice over clips to lay down over the track and cover certain images.

Then we started bringing in clips and putting them in an order We played it through a few times to see what needed adapting, and started putting on a few effects resembling cctv cameras to make it look like someone else was watching.

To add the titles, we downloaded fonts from the internet and imported them onto final cut.

My brief was to make a trailer focusing not only the storyline, but also the make up, so we picked shots that highlighted the make up with plenty of close ups. We avoided any dark shots and underground footage as the lighting was too poor and didn't work as well. The daylight shots worked best as they showed the make up well.

Wednesday 21 April 2010

Filming the last scene in Lennons


I arrived at Lennons at 11am where Sparky was already waiting for me. He helped me set up the lights in the middle of the room. It's a small venue and the spotlights we had were extremely bright, but could be dimmed down if necessary, the lighting needs to look low. Unfortunately Sparkey had to go to Bournemouth so he couldn't stay to help. So the first thing goes wrong... one of the lights Uni gave me in the kit is broken....GREAT!! There would be no time to take it back and get another one as they're really slow there so I would be waiting too long.

I've had real difficulties finding models/actors last minute. Everyone is busy with their own separate projects and I made a casting call on 'model mayhem' and 'pure storm' (where my account got suspended and the casting call cancelled for putting up my email address, which 'apparently' you can't do!). So I set my facebook status to 'actors needed' and put a notice up in the performance department at uni, a few days ago but knowone has got back to me. Therefore my flatmate Jennie and good friend Heidi agreed to help me. They arrived at 12pm where I started on their make up which took a total of an hour.

The designs were simple as I had restricted time, I applied the 'infinity wound' on both their cheeks only on opposite sides so that for the scene where they are facing each other at the table, pretending they're not quite frozen and still moving a little, the 'infinity signs' not visible, they suddenly move their heads towards the camera with a sharp movement, and both reveal their 'infinity wounds' engraved on each cheek.

ANOTHER PROBLEM...

So.. not only is one of the lights broken, but the uni camera is also broken!!!!

I wanted to cry, I had rented out Lennon's, dragged my two friends there even though they had loads of their own work to be doing, and now there's no camera!!!

I had organised yesterday, to use my friend's camera which is HD but someone else was using it till 12pm. Well the time is now 1pm so I quickly ran over the road to Uni to meet my him and get the camera. I arrived back at 12.30 and finally we began to film the first shot.

This scene was to be filmed at the bar, however because I did the lighting not Giles Andrews, it wasn't well lit at all and the footage isn't good enough. I changed one of the lights around and got it as well lit as possible for the next shots. I filmed a few shots that I was happy with and thought they looked really cool as Heidi was great at acting like a zombie. I was able to get some real close ups of the make up which was the main thing.

Overall my day didn't go as well as planned with all the problems, although I managed to turn it round and make it work. I only hope the footage I've got is good enough to go on the trailer.

Tuesday 20 April 2010

Lennon's Filming

I have hired Lennon's Night Club in Southampton, and found two actors to play zombie roles. Anthony is meant to be in this scene, and I am meant to be filming it with his camera tomorrow. However due to the volcano eruption in Iceland, and the cease of all flights, he still isn't back. His flight was meant to arrive back yesterday, but I don't think he's going to make it. It has been really hard to find a camera, and actors to help as everyone is busy with their own projects.

If he can't attend which is most likely I will have to carry on without him. I will get to Lennons for 11am, set up the lighting with Sparkey, do Heidi and Jennie's make up, start filming at 12pm finish by 3pm.

As I don't have a clue about lighting Sparkey (studying film production at Solent Uni) has agreed to help me set it up. I helped him by doing the make up for his short film, I know he's very busy too so it's extremely kind of him.

I will keep you updated if I hear from Ant.

Monday 19 April 2010

AHHHHH!


Anthony was meant to be arriving back today as we are filming the last scene in two days, on the 21st, its extremely unlikely he will be back in time. However I am more worried that he won't be back in time to give Steph the footage and therefore she won't be able to edit our version in time and I won't have my trailer to hand in!!!!

I am in a complete panic, but there's nothing I can do but wait to see what happens. I have thought of various contingency plans which involve raiding his home to get the footage that we've already shot, but at the moment I can't get hold of him.

I will be able to work around the last scene in Lennons even if we have to cut his part out, however I just pray that he is able to get home soon, otherwise I'm stuffed. I have been checking the flights daily and it's looking slightly better today. I have textd Anthony to ask what's happening his end, as worst case scenario would be for me to go and get the footage from his house, but he's just replied that it's in his bedroom which is locked!! Fingers crossed...

VOLCANO ERUPTS IN ICELAND!

All flights in and out of the UK and several other European countries have been suspended as ash from a volcanic eruption in Iceland moves south.
Up to 4,000 flights are being cancelled with airspace closed in Norway, Sweden, Finland and Denmark among others.
The UK's air traffic control service (Nats) said no flights would be allowed in UK airspace until at least 0700 BST on Friday amid fears of engine damage.
Safety group Eurocontrol said the problem could persist for 48 hours.
The volcano is still spewing ash and the wind direction is expected to continue bringing clouds into UK and European airspace for some time to come.

Friday 16 April 2010

Stephanie Bourke

Stephanie is a good friend of mine who is an editor at the BBC. My co-director Anthony, will produce a directors cut of the trailer.

I want to do two versions of the trailer, one to be a conventional film trailer. And one, to purely show my make up design in a more abstract mixture of make up film and art. Steph edited the video I made for my dissertation practice, and I have asked her to help me create this one in a similar style. I loved how she used different effects in the last one to exaggerate the horror and chilling atmosphere created, in an astonishingly intense piece of video art.

I am extremely nervous as although I have told Steph exactly how I want it, I won't be able to be there for the whole edit as I have other work to complete. I will be checking at various points that all is going well.

Thursday 15 April 2010

Filming with HD

The film we used is HD. The reason why I wanted to do a trailer is because most things nowadays are made for the screen, whether it's for computer, TV or film. Even a portfolio of photographs can be viewed on an iphone or ipod. Many fashion companies are now using interactive media to promote their new collections, one of the newest is 'Fashion Film' see www.showstudio.com where designers can exhibit with exciting innovative videos that can be uploaded anywhere and therefore accessible for almost anyone. Fashion designer Gareth Pugh performs a series of make up applications which are not only clever but humorous too. Even though he is a fashion designer, not a make up artist, this is art and very entertaining, and would be a good marketing tool (see Gareth Pugh - MAKE-UP-ATHON).

High Definition (HD) adds realism to film because of the clear quality, but it makes a make up artists' job much more demanding. Every blemish is accentuated by HD and therefore make up standards need to be very high. Using HD will need a more thorough application of make-up to hide beard shadow and shine. Air brushing is an efficient way of applying flawless foundation for close HD filming, although on this shoot which was all on location, using an airbrush was not practical. Blood and sfx can tend to look over accentuated and particularly shiny on HD. Red becomes very bright, and as a make up artist I needed to be vigilant to make sure the make up was maintained throughout the shoot as everything shows up more on HD.

Wednesday 14 April 2010

House Scenes


In these scenes
: Various zombies trying to get into the house and Ant walking out of a house stealing a laptop.

I started off the day by making up 4 zombie characters, each zombie would have the infinity symbol engraved onto their necks...

Character 1: Timothy Monk.

Inspiration: Infinity shoot, Graduate film make up shoot, Bloody Zombie shoot

I wanted this design to contrast blood and gore with editorial and I did this by combining elements taken from previous designs in the final shoots such as creating the Infinity wound symbol on his neck under his chin, blood and bruising on his mouth based on similar characteristics from the bloody zombie shoot where his lips are bruised from hacking away at human limbs. I took inspiration from the black thread used in the graduate film make up shoot to bring in the editorial element. By placing the thread under one eye then having it go vertically down the face represents a tear drop. I made a painting when I did an art foundation and I dripped black acrylic down the page from under her eye to look like tears and I loved the marks it made. I tried to achieve a similar look only using thread. By having the horizontal infinity wound across his neck and the the vertical thread coming down the face creates a perfect structure as the viewers eye gets lead dow his face by the vertical thread to the wound which remains horizontal.

How did I do the make up:

The lighting kit we used was quite bright so therefore the base had to quite heavy. I applied the black thread with spirit gum and the wound the same way I did on Anthony on day two of filming, using tuplast, rigid collodion, greasepaint, wound filler congealed and pro blood in dark.


Character 2: Felix Gittins

Inspiration: Bloody Zombie Shoot, Editorial girl zombie shoot.

I created the same Infinity symbol wound as I did for Timothy on his neck under his chin. I wanted his eyes to stand out so I painted purple and black under his eyes which also represents soreness. I used red thread the same as I did for Pedrom when we shot the zombie chase in central London. I learnt from that day as I shouldn't have stuck the thread on till last as it comes loose with movement and it also starts to crinkle, from this acknowledgement I will place the thread on last and just before he starts his scene.I followed the same principle of keeping the lips deep purple so that it represents blood and doesn't look feminine. I also created a similar scar to the one I did on Duncan on the bloody zombie shoot which looked extremely effective.

How did I do the make up:

I applied the purple greasepaint under the eye. Greasepaint worked the best as opposed to aqua or shadow as it's easier to blend and shadow often drops down the face which can cause the make up to smudge, which I learnt from past experiences. I used a deep purple lipstick from No7. I created the scar using the same technique on the bloody zombie shoot and on Jeremy Gittins in the basement scene, using rigid collodion. The Infinity wound was created in the same way as the others (please see Anthony Roberts make up for basement scene for details).


Character 3: Jodie Bourke

Inspiration: Editorial girl zombie shoot, Bloody Zombie shoot

I created this look based on the black eyelashes from editorial girl zombie shoot and the blood and gore from the bloody zombie shoot with a few extra wounds on her cheek as her character is a vicious zombie.

Charater 4: Pedrom Kamali - Zonouzi

Inspiration: Medical Reference of graze.

This design was quite basic. Apart from the Infinity along with the other zombies engraved onto the neck I just applied a mixture of fresh scratch wound filler and greasepaint for bruising colours on the left side of his cheek.


First shot: We set the lighting up in the kitchin for the shot where Jodie appears through the window in the background as Ant is circling a frozen person. We had to do this shot in the Kitchin as the initial plan was to shoot it in the front room window but there wasn't enough natural light for it to work. But we managed to work around doing it in the Kitchin which worked better as the window was longer which meant it got more of her body in.

Second shot: So that we had a diverse selection of people in the trailer we got my elderly neighbour to play a frozen extra. All she had to do was stay still but it was hard to get her to understand what we were doing so after a few attempts we got there in the end.


Individual Make up shots: I wanted to get zoomed in individual head shots of zombies to really exhibit a close up of my make up designs. These would be short snippets in the trailer but to show my make up in close detail.

We also filmed shots outside where lighting wasn't required as it was conveniently a really sunny day. Giles who was operating the camera filmed from different angles to give a variety and also to see what angles would best show off my make up which I can adapt accordingly in the editing process. I liked the angles where Giles filmed low on the ground and zombies would attack from above as it created a real action shot but with a full view of all the make up as it was birds eye view only looking up.

Tuesday 13 April 2010

Off licence/Basement Scenes


Today we filmed two scenes using the same location at a local off licence, McClusky's.

Till Scenes: Stealing money from the till/putting it back.

These two scenes consist of two shots in the same location. First, Anthony casually taking money out of the till as the city is frozen and he can do what he wants. And the second, hurrying to put the money back as he is told that the more he does bad things, the worse it will get and the more zombies will appear.

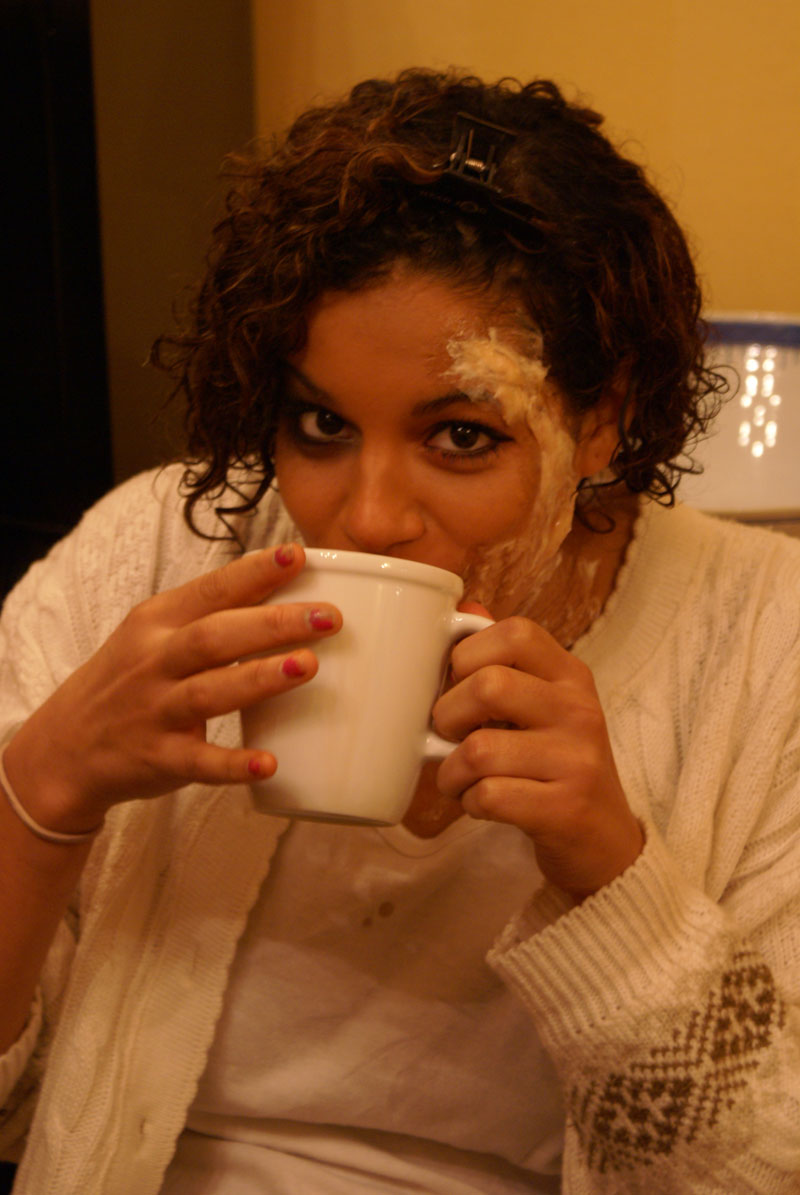
We all met at 8.00am at Frank McClusky's off licence where Giles Andrews the lighting/camera man had already started setting up the lighting in the shop. We had limited time as it opens at 10am, and would therefore have to finish filming before that to allow time to strike the lighting. For these scenes it was natural make up which I did beforehand. My friend and I played 'extras' that were 'frozen' whilst Anthony came in and took the money.

In the scene, Anthony comes running into the shop in a panic to put the money back and make things right so I added red greasepaint to his face very subtly in the areas that you would naturally get hot like cheeks and ears, and placed glycerin on areas such as the forehead and top lip to look like he was sweating. We got him to run around the block so that was genuinely out of breath to play the part better (method acting). This worked well and improved the quality of the shot. We finished spot on time leaving 5 mins to pack up the lights.

Basement scenes:


Jeremy Gittins

My dad (who is a professional actor) plays the part of the mysterious man who gives Anthony the 'infinity pill' and narrates the trailer. He arrived at 9am for make up, I wanted to make him look gaunt, menacing and supernatural, so I designed a make up that would achieve this using subtle techniques such as:

Bruising under the eye - I followed his natural under eye socket, darkening it slightly by adding bruising colours such as purple, green and a touch of yellow so that it looked extremely realistic on camera. Every time I built it up I would take a photograph to see how it would come out under the light on film so that I could add more as it's easier to build up but harder to remove. I purposefully didn't powder the bruise as they are naturally shiny so didn't want to loose its realism.

I used concealer on a few of his blemishes and powdered quite a lot as the lighting was extremely strong to light up the whole basement. I then created scars on both sides of the face. I wanted the scars to look old but not completely healed. I pinched the loose skin together and then cemented rigid collodion in the middle, once it had dried I patted a touch of concealer over it and with a fine brush added a touch of red/purple greasepaint to create the lasting residue of the wound and set it with powder. I did the same thing for the scar on his neck only in the infinity symbol shape. I placed this on his left side as there is a part in the scene where he moves his head revealing the scar, and it would have to be on the left side to be visible.

Anthony Roberts

Anthony is the co-directer and plays the lead character in the trailer. He thinks life is great when the city is frozen and he can do what he likes after getting tricked into taking an infinity pill. That is until he realises that actually things are getting worse and worse, and if he doesn't put things right, he will become a zombie.


First part of scene: Anthony gets given the infinity pill

Giles Andrews is filming and did a really good job on the lighting. I'm so glad I employed him for these off licence scenes, as particularly here in the basement there is no natural light, and proper film lighting is really necessary.

For this particular shot Anthony only has natural make up on.

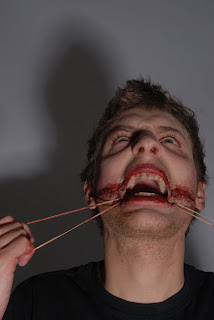
Second part of scene: He gets told that he must put things right or he will have to deal with the consequences.

In this part of the scene Anthony is very flushed and sweaty as he is nervous and panic stricken. I showed this by blending in red greasepaint around his cheeks and ears with powder to set it, and then applied glycerin with a pour sponge on his forehead and top lip.

I then had to create an infinity symbol wound on the right side of his neck as had just got bitten by a zombie, after which the infinity symbol appears engraved into the skin. It had to be on his right side as he had to move his neck in sync with Jeremy, and so the scar was visible we chose that shot. I created the wound by drawing the outline with a fine line of red greasepaint, blending it so that it's a soft line. I then followed the guideline with tuplast, placing it on with a hair pin so that it goes tacky and creates a raised texture. Then I sealed some the edges with rigid collodion which pulls the skin tight creating the scar. Once that dried I painted over with red greasepaint filling in the ripples of the scar with a darker red and purple. I then applied wound filler with a hair pin, in lumps all the way round; and finished with congealed blood applied with a stipple brush to create a realistic wound. I finished off the design with a few scratches on his face where he had been fighting off the zombies. I did this using fresh scratch and a stipple sponge.

The whole day went really well and we managed to get everything we wanted. I was very happy with the make up as it looked realistic and went as planned. The only problem we had was when we were filming in the basement - we were literally underneath the shop floor and could hear customers' conversations as the walls were very thin. However we managed to work round it and stopped when it was too loud. We also had to ask if we could turn the fridges off for a while when we were filming as they made a noisy hum. Apart from that I was extremely happy with the footage.


Monday 12 April 2010

Character 6: Anthony

For this scene Anthony has yet to be bitten by a zombie therefore his make up is just natural. As we are filming in HD, I had to apply a good coverage make up that covers his blemishes and uneven skin tone, but isn't so heavy that it will pick up on screen, in natural light. I have used Mac coverage in the places that need covering and blended it out. Anthony, like many boys/men tend to have naturally red ears which I learnt from working in Double Take photo studios, so I made sure I used concealer on them to reduce the redness. I had to keep an eye on them throughout the filming for continuity. I didn't want to change the hair too much as I wanted it to look natural again, easier for continuity.

Character 5: Sarah


Influence: Dracula, 'editorial girl' zombie shoot, 'renaissance shoot'.

I wanted this character to be more glamorous than gruesome, as they are in old black and white horror movies, so I can show a contrast amongst my designs. I followed the dark shading under the eyes to represent bruising from a black eye, as in one of the make up stages in the 'editorial girl' zombie shoot. This is a dark edgy look and is more editorial as there is no blood. I decided to give her the other contact lense, and by creating a deep shadow under the eyes, the one contact lense will stand out more because of the contrast of black and white. I experimented beforehand using aqua color, grease and powder. I found the grease blended with powder was most intense and effective; it was also easy to blend without causing a mess. I darkened the eyebrows giving them more structure and shape as I did in the 'renaissance shoot' only more subtly as I didn't want to create too much attention to the top of the eyes, only the bottom. I wanted her to look paler than the other zombies in contrast, and give her dark gothic features. I based her black lips, dark shading onto the contours of her cheek bones, and big eyes on the 'renaissance shoot' . I wanted to use big black eyelashes for the trailer as they would stand out more on film, and from a distance.

How I applied the make up:

I began by mixing a third of her normal skin shade with two thirds of white Mac coverage which gave a natural yet extremely pale tone on her face. I blended this right down her neck and chest, and round her ears so it was even and set it with powder. I began on the eyes, blending a line of greasepaint on the top eye with black powder to create a smokey look and the same on the bottom however much more exaggerated. I blended a purple powder shading into her cheekbones, highlighting the top with a light pearl colour to give a sense of depth. I very carefully painted her lips dark purple making sure that it was extremely precise and even. I then darkened the eyebrows with a dark brown shadow so that it was very dark but not as harsh as black. I wanted the eyes to be bigger balancing out the dark shading on the bottom so I placed big thick black eyelashes on with duo adhesive as it stays on the best. I chose Sarah as the other person to share the white contact lense with because she also, had a extremely symmetrical look and the one lense gave her a strangeness that stood out on the 'simple' make up. I finished off by back combing her hair and giving it plenty of volume - wild but more editorial.

Were there any problems?:

Yes! I had finished Sarah's make up and was finishing my sixth character, when I turned round to find that she had poured red food colouring (that Anthony had brought to create a pool of blood on set if needed) all over her neck which looked terrible as it was pink. I was absolutely furious because all the designs had been meticulously created beforehand and this particular design was to be more editorial with no gore and wounds, consequently no blood!
As this was food colouring it stained the skin pink, and there was no point in spending the time trying to remove it as we were on a tight schedule. Therefore I had no choice but to correct it slightly by using a deeper blood and adding splatters to her jumper, to make it look like she'd had physical contact with another zombie, but her face remained clear. I had to remain professional and bite my tongue, although on a professional shoot I'm sure the actor would not have done this.

What would I do differently:

I would have extended the make up on her eye lids further and maybe taken it into the eyebrows as although I wanted her make up to be less zombie-character based and more subtle, it could have been exaggerated slightly more for film. I would have explained in advance that all the make up had been specially designed, and no-one should touch, or add anything! Especially food colouring!!!!


Character 4: Alex


Influence: 30 Days of Night, Gagged to Death Shoot and Bloody Zombie Shoot

The make up for this character is all focused on the mouth, as the scenario for this zombie was that he had just been feasting on human flesh. I have used a combination of the 'gagged to death' shoot and the 'bloody zombie' shoot to create a design around the mouth continuing down to the neck. I have followed a similar structural composition from 'gagged to death' but developed it further combining the wound aspect from the 'bloody zombie' to create a realistic blood thirsty zombie. When I create my designs I look at them together as a group so I can view them in terms of how they fit together compositionally. I have already got a mixture of vertical and horizontal lines from Pedrom's make up, Jodie and Steph both had quite vertical make up designs, therefore for Alex I wanted to complete the balance and create a wound that extended vertically down the neck but applied horizontally across his mouth. He is wearing glasses in the trailer, balancing up the horizontal line. As we only had 4 sets of contact lenses for 5 zombies, I have had to choose which ones I think would look best with them. For Alex's character I thought it would look good to have only 'one' lense, as the rest of his make up is so symmetrical and I thought I'd upset the balance to make it look freaky. In 30 Days of night one of the characters has a similar look of a horizontal wound going across the mouth. I have printed off the image and used it for referencing with regards to composition.

How I created the make up:

I used a very light shade of Mac full coverage for a pale zombie colour. We associate zombies with being very pale because they are dead bodies which have been brought back to life by a supernatural force. I built up layers of tissue and gelatine in the same way that I did for the others making sure the gelatine wasn't too hot before placing it onto the skin. Once this had dried I sealed some of it at the edges with rigid collodion which tightens the skin and creates a realistic scar. I used mainly bright red with only a little purple as it's supposed to be a fresh wound with new blood from a human limb. The older the wound the darker it gets so that is why I have used mainly reds with a touch of purple to indicate a deep wound. I applied some tuplast and picked some of it up using tweezers to suggest raised flesh. Once I finished painting the wound with greasepaint I gave it a light dusting of powder to set it and make it last longer especially important when he's moving about. I applied clumps of wound filler to look like clots of blood, and mixed them with congealed blood. This was the perfect consistency to stay on the face well, for the day. I will apply running blood on set otherwise it will dry by the time we film. I blended the edges in with splashes of blood using a stipple sponge to finish it off.

What would I do differently:

I would consider the teeth more. I placed some blood in the mouth around his teeth to look like he had been swallowing blood. However, I should have s considered the fact that he would have been eating everything and anything so his teeth would be rotten and extremely dirty. I should have applied some dirt around his teeth as I did in the 'bloody zombie' shoot. I will remember this for my next zombie.

Character 3: Pedrom


Influence: 'Editorial Girl' shoot, Alice in Wonderland.

This is by far my favourite make up design in the trailer as it's the most figurative yet stylised juxtaposing some elements from my other more bloody designs which are more literal. This gives a good balance as I now have a selection of zombie designs that all look distinctive in their own different way and are far more inimitable than traditional zombies. I have based this design mainly on the 'editorial girl' zombie shoot as I found it the most effective in achieving zombie characteristics whilst demonstrating innovative make up skills with my own interpretation. I decided to take the 'editorial girl' design but apply it to a boy rather than girl to create an unconventional visual. The make up is quite feminine because of the bright, fine red thread which although symbolises blood. I don't want this to be mistaken for lipstick so I painted black on the lips, which is what I initially used in my shoot. Long eyelashes tend to be a symbol of feminine beauty so I drew them to look like black zombie tears instead, indicating fear and horror. I drew them on both eyes as opposed to just one eye which I did in the shoot, as I wanted to create a symmetrical design so that I wouldn't need close ups on both sides in the film. I also feel the symmetry has more impact. The make up on the Mad Hatter in 'Alice and Wonderland', inspired me to create the design on a male as Johnny Depp's make up is an eccentric contrast of colours and shapes that doesn't make him look exactly 'feminine' but more wacky and unorthodox which is what I want to achieve.

How I created the make up:

I started with a pale base using Mac full coverage. I decided not to use grease as it would have come off with spirit gum and I will be painting intricate detail on the eyes which may smudge after a lot of powdering needed on grease based make up. I slightly blended in some dark purple to the bottom of the cheekbones for a subtle gaunt look. I used a deep purple rather than black or grey to achieve this as the purple made it less harsh and slightly warmer.

I used a mac eyeliner gel to draw on the bottom lashes as it stays on better and is a harder consistency and it won't smudge as easily. In this design it needs to look sharp with a perfect and precise hard line. To make sure I had a steady hand I would draw the lines on with a fine brush holding my wrist steady with my other hand. I did quick strokes rather than slow ones as I found it easier to get a straight line this way (really glad I practiced long and hard beforehand to get them right). I finished off the eyes with a touch of mascara and a fine line of black on the eyelid, simply to open the eyes and make them stand out on film.

I moved on to the mouth. I started off by applying black lipstick to the lips and then began sticking on the red thread using spirit gum, which is the strongest adhesive that can be used on the face without reaction. My design consisted of the thread going all round his mouth and over his lips, but because we still had a fair bit to go before we were to start filming I just applied the thread under and over his lips across to his cheeks as otherwise he wouldn't have been able to talk or laugh which would be asking a bit too much (especially as there was a great comraderie amongst the cast). I brought spirit gum and thread with me in my set bag to apply the rest just before filming. I powdered over the glued areas to reduce the shine and lastly applied the contacts.

We had a slight problem as Pedrom found it harder to put the contact lenses in than the others as his eyes were sensitive. This meant that I would have to be fastidious with cleanliness, otherwise I could give him an eye infection. I asked him if he would prefer not to have them in as I don't want my actors to feel uncomfortable or pushed into something they don't want, but he insisted that I tried. Someone lifted his eyelids up whilst I placed them in and after many laughs and attempts, we finally got them in without ruining any of the make up. I should have thought about the lenses before I painted on the black lashes which was a mistake I will learn from.

I sprayed sea salt into the hair so that it looked messy and rough, but keeping the style as I wanted it to remain like normal hair as opposed to zombie to keep the fashion element of the design.


What I would do differently:

As the thread was being stretched over the mouth and glued into place, after a lot of movement it started to crinkle and parts fell out of place. I should have done the thread when we were on set in London just before filming, to make sure it was neat and the lines were sharp and straight. To do this I would have had to build in make up time on set, which would have meant getting everyone there earlier. As their call times were already really early, this would have been difficult. However I have now learnt from my mistake and will consider this for next time, especially if it's a professional shoot.

Character 2: Stephanie


Influence: a combination of 'bloody zombie shoot', 'gagged to death shoot' and the 'renaissance shoot'.

For Steph's make up design I wanted to create a mixture of designs from my photoshoots, because there were parts in each that I liked but wanted to contrast them to create the perfect combination of editorial vs film. I chose the editorial glamour side of the 'renaissance shoot'; big black eyes going into a point which turned to blood. I produced this effect as I wanted it to look stylized, with the impression that she's crying tears of blood. The whole point of these radical designs are that they are different from the average zombie and display a unique combination of style and realism. I also created a gorey wound similar to the effect created on Jodie, from the 'bloody zombie shoot'. I applied this mainly around the mouth to look like she had just been feasting on human flesh - a common zombie characteristic. I also applied a similar sort of wound on the side of her forehead so that balanced the overall design. To create these wounds I have to consider the cause, and in this case she was a blood thirsty zombie that was hungry for human meat. Therefore she wouldn't just have blood around her mouth, she would also be fighting for her food. That is why I applied another wound to her forehead and a lot of bruising around these wounds, as I picture her taking a beating from her victim before she defeats them. By combining the editorial glamour of big black eyes to symbolize her having a bruised eye, with the gory aspect of the design, I am successfully juxtaposing the two styles together to create a well constructed and balanced design. To finish off, we inserted a set of white contact lenses which contrasted well with her black eyes making them stand out.

How I created the make up:

To begin with I made sure her face was entirely clean. I then started with her base, a few shades lighter again using Mac full coverage with a translucent powder to set. Unlike the rest of the zombies, I had to put Steph's contact lenses in first as I didn't want to ruin any eye make up from watery eyes. I followed the same procedure as Jodie to get them in and after a few attempts they were in. Next, I patted on a thin layer of translucent powder under the eyes to catch any loose eye make up powder that dropped. For an intense colour on the eyes I opted for greasepaint with black powder over the top. I had tried in advance, a number of things such as Aquacolor, cream shadows, eyeshadows and eyeliner but greasepaint and powder worked best with the most intensity. I then blended it in with a fine line to the corner of the eye where I mixed it with red blood and extended the line to reach the the side of the nose at a point. Lastly I applied the gelatine and tissue to around the mouth area placed randomly to look like raised flesh and on the left side of her forehead. I followed the same process as I did with Jodie however I wanted it to be even more bloody as it was to be a freshly made wound. Therefore I needed to use a lot of running blood as well as congealed. As Steph was only my second zombie to be done, there would still be a few hours before filming and I applied the majority of the blood just before she was to go on set. I created a lot of bruising around the mouth area using a bruise wheel and my grease palette. I also used a hairpin to pat on fresh scratch to create fine scratch marks which looked effective. I learnt this method from attending my make up sessions with Sue.

Styling:

Steph wore an average everyday black top, the opposite to Jodie's white top, as I wanted everyone different to make them all stand out individually on film.

What I would do differently: Next time I would make the eyebrows much darker, looking back I think they needed to be more defined with extra colour and shape. I have learnt now what shows up on camera well and although at the time her eyes looked really exaggerated I could in fact have coloured them right up, extending the brow further and following the shape even higher up her head, similar to the designs I did in the 'Club Kids Graduate' make up design.

Character 1: Jodie


Influence: 28 Days Later, 'bloody zombie shoot' and 'editorial girl zombie'

I've used a combination of make up from the photo shoots I did such as the 'bloody zombie shoot' and the 'editorial girl zombie'. I used the wound from the 'bloody zombie shoot' but extended it down one side of her face to the neck, as I wanted to exaggerate it in order for it to show up in the film. I decided to pick that design as it looked extremely effective in the shoot and I wanted this character to be the distinctive gory one out of the group. I curled her crazy afro hair backcombing sections to give plenty of height as I wanted it to be big and full of volume, as a zombie state of mind is full of rage and anger, and the hair would also be wild. I used the idea of a head bandage from the 'editorial girl' shoot only because, as I previously explained, the hair substitute wouldn't have worked in the film so I went the literal route and placed a blooded bandage round her hair as if she had injured it. This went with her whole image, as the way she was asked to act was very erratic and vicious therefore she would have crashed into a lot of things once she had turned zombie, resulting in her massive wound, big hair and bandage to stem the bleeding. I finally added white contact lenses which completed the whole zombie look and made her look extremely terrifying.

How I created the make up:

I started with the make up base using Mac full coverage a few shades lighter than her skin tone to create a pale pallor. As we are using an HD camera I needed the foundation to be thick enough to give full coverage but not so thick that you'd see it on camera, so I blended it in well to create the right consistency and set it with powder. I applied black eyeliner quite thickly to the top and bottom lids but blended it for a smokey look which 'glammed' her up a bit and gave a slightly editorial edge. I then began building up layers of gelatine mixed with tissue randomly down her face and neck. I made sure that the tissue was cut unevenly so that it wasn't in a straight line, as the wound would have an irregular shape to it. I heated up the gelatine in the microwave and tested it on my hand before placing it on her face as I wouldn't want to burn my model/actor. Once it had dried I started to paint over it using the technique with greasepaint as I did for the bloody zombie make up. Once I had finished the wound taking it right into the hairline which I learnt looked better and more realistic from my mistake in the 'bloody zombie' shoot. I put on the bandage which I had soaked in blood and tied it at the back tucking in the end so that it looked good from all angles. Lastly we put in the contact lenses that had been soaking in the solution overnight. I wanted to put them in last, as they are quite irritating to have in your eyes and I wanted my actress to feel comfortable. I made sure both our hands were extremely clean before I got her to wash the contact lenses again in the solution and gently place them in her eyes. I have found through practice that its much easier to show the model/actress how to put them in themselves, rather than for me to do it for them. We managed to get them in near enough straight away thanks to this technique, and without watering eyes.

What I would improve:

Given the short time I had for this design which was the hardest and took the most time I was very happy. If I did it again, I would have used more layers of tissue and gelatine on the eyebrow to make her look like she had a swollen eye, and I would have done a little more bruising and dirt over her face and neck, as her character was a crazed zombie crashing into things. I also found that throughout the day, the blood and tissue started to peel off due to movement, so perhaps I should consider using other make up such as latex which would stay on for longer. I will have to experiment using it, as if it looks as good as gelatine and stays on longer I'll use it instead, in future.

Styling:

I got Jodie to wear a plain white tank top so that I could ruin it with blood stains and dirt. She wore comfortable jogging bottoms as I wanted her to be able to run freely in them and I wanted the clothes to look like everyday clothes.


Character breakdown for zombie chase


I produced five different zombie make up designs for this scene, these were based on the various photo shoots I did so that I could choose which looked the best for the trailer. I then had to adapt them further so they would be practical for filming.

The reason why I chose to adapt these final designs from the photo shoot was because I had to consider which ones would work practically in a film. For example, when I created the 'editorial girl zombie shoot', I attached hair extensions in layers around her head, which were pinned securely at the back. This wouldn't have been seen in the photo, however, on film it wouldn't have worked as not only would it have come undone with movement when she was running, but you would have seen all the pins at the back. I couldn't have corrected this with longer hair extensions as they weren't available.


Sunday 11 April 2010

Day 1 of filming on location....

We had planned to start the make up at 2.15am as we needed to get into Central London before sunrise I researched would to be at approx 6.15 am. I had 6 characters to make up so I would have to complete each make up in 25 minutes, however I aimed to complete each one in 20 to give me extra time if I needed it at the end. I managed to do this in the time frame as I had been practicing methods and techniques that would reduce time. For example using a hair dryer to dry the latex and gelatine; applying the parts that need to dry first; leaving one lot of gelatine/latex to dry whilst I'm applying someone elses. I had organised my make up kit the night before with just the equipment I would need on the day, this worked well and saved time.

I woke up at 2am, Jodie had stayed at my house so that it would be easier to make a quick start. The others arrived promptly at their call times, in 20 minute slots. I asked them to arrive with clean faces, which they did, and whilst they waited for their make up, they could relax with a cup of coffee and have a look at the script. I made up 6 zombies in two and a half hours, and was very glad I had practiced, and timed the practice in advance.

We left the house at 4.45am to head up to Waterloo which was our first location. There were a few locations around Waterloo we wanted to use for filming but we went straight to the South Bank as we were going to film the main zombie chase there, and we wanted to film it before anyone else was around, to create the illusion of a 'frozen city'. We also picked this first as the other locations were much quieter as they weren't as picturesque and touristy, without a great deal of natural light anyway, so it wouldn't matter what time we filmed. We began with the zombie chase. My co-directer Anthony, also plays the main character, the boy who gets chased by zombies, so in this scene I had to direct and operate the camera!! Anthony had previously given me a couple of lessons on how I should hold the camera, how to focus, zoom and what angles are good to use. Bearing all this in mind I used my creative camera skills to film the first scene. Although I'd had a little practice we had to do a few takes as it took a while for me to get used to filming and I wanted to make sure I got the shots that complemented each make up - I am a perfectionist! I used different camera angles and ways of filming such as from behind corners and statues, to bring the atmosphere of the city into focus. I made sure that I had a great deal of footage showing the Houses of Parliament and the London Eye, as this is important to help identify the fact that I'm an up and coming young British make up artist; as well as juxtaposing the surreal aspect of zombies roaming central London with everyday life in the City.

I took with me a set bag of essential make up for touching up such as: powder, spirit gum, greasepaint palette, brushes, eyeliner, congealed blood, running blood, wound filler, hairspray and a comb. Because we were filming outside, the wind was constantly blowing the hair out of place which frequently needed sorting out. There was a lot of running involved which caused the actors to get sweaty so I had to powder their make up so that it didn't look shiny and I had to re- apply the blood and re-attach the thread with spirit gum after each shot. I made sure I kept a close eye on everyone's make up before each shot.

We chose to film on a Sunday so that it would be quieter, however at about 7.30 it started to get busy on the bridge. Therefore, we had to wait until there were no vehicles in view before we started recording which made filming slow. Eventually the traffic built up and we had to move on. We managed to film plenty in the time slot we had allocated ourselves, however next time I would manage my time more effectively and visit the location myself before hand (I had left the recky to Anthony as I was in Southampton) and plan exactly what we were doing in each scene at each location, as I only had a rough idea.

We had to keep to the time schedule and finish filming at that location at 7.45am. We moved on to the second location which was in a tunnel under Waterloo station, the walls were covered in graffiti. The secluded graffiti tunnel was an excellent choice of location as the bright painted walls added a sense of urban decay, often associated with violence, and apart from a few vagrants we were pretty much alone. In this scene Anthony gets chased by the zombies into the tunnel where he gets bitten by one of them, and zoomes into each character to show off the make up. I recognized after filming a few shots that the lighting was too dark so it was hard to see the make up so I placed a marker about 6 meters into the tunnel where they had to stop so that it was light enough to get a clear focus of their faces.

Whilst we were filming we came across the woman who broke the Guiness World Record for the most piercings and asked her if she didn't mind us capturing a shot of her which she happily agreed to. I don't know if we will use it but she certainly looked horrific enough to star as a character!

Saturday 10 April 2010

Final retouch

Jelana has just sent me the final edit. I am extremely happy as she has lightened the background which I wanted as the first edit was too dark and didn't tell you anything about the mood and circumstance of the story. As soon as we emphasised the shadow by lightening it, it increases the impact and horror of situation. She has also brightened the face slightly so that the red in the blood stands out making it look fresh and therefore more disturbing. It also helps focus the viewers eye straight away. The viewer then works out what happened when reading into the image, ending up with the white zombie eyes. Jalana photoshopped them white which gives even more impact.


The edit was exactly what I had in mind and Jelana worked quickly and efficiently, I will definitely use her in future and recommend her to others.

Another trailer meeting..

Today I went for another meeting with Ant to give him a list of dates to film the trailer. I have gathered together a list of actors to take part, what date and times they are available and a list of locations so that I can organise a call sheet. We went through the list and narrowed down a weekend in which the majority of cast and crew could attend and then any other filming needed can be done the following week. I contacted everyone on the list to confirm they were still available and committed to take part. A couple dropped out but I wasn't worried too much as I have cast double the amount I need as a back up plan, and I can always do with extras. I have learnt from past experiences that people let you down last minute therefore a couple of my friends who are sisters that used to do performing arts at college have said they will 100% take part and as they are close friends I know I can rely on them.

When I was thinking about the cast I wanted a diverse group with a variety of different backgrounds and a mixture of ages to represent real people as opposed to "good looking actors". I aspire to Dazed and Confused as it is an independent magazine that combines fashion with art, and known for using young up and coming British talent, you won't see the obvious and popular models and celebrities in this magazine. With a similar ethos in mind, the approach to my trailer will use a combination of fashion with film as opposed to fashion with art.

Friday 9 April 2010

Gagged to Death retouch sample

Jelena the re-toucher has sent me back her edited version of my image. I was not quite happy with the background as I felt it was a little too dark and undefined, so I have asked for it to be lighter and for her to photoshop white zombie eyes. He would be gagged and tortured because he has shown first signs of a zombie. From the image you can tell that he hasn't fully converted to a zombie as there is no indent mark of an infinity sign which occurs once you have turned into one.

Here is the first edit:


Here is the final edit:

Jelena has lightened the background which makes the make up stand out more. She has made is face lighter which also contrasts more with the wound creating more focus on the key aspect of the image which is the wound. The eyes have been photoshopped like I wanted to zombie eyes this completes the image and enhances the zombie characteristics to fit with the theme.


Gagged to death shoot - re-touching

Unfortunately the photographer who took the photo's for this shoot wasn't able to edit them as she is in her third year doing photography and has a deadline next week also. Therefore I found a re-toucher on the networking site 'Model Mayhem'. I looked through her portfolio and was impressed with her work, I was looking for someone who had an eclectic portfolio to ensure they would be able to re-touch my image well.

I emailed her with exactly what I wanted to be done and asked for her price list, in which she promptly replied with £8 per image. I thought this was reasonable as long as she does a good job.


This is one her re-touched before and after images.

Another horror shoot - Gagged to death..

Today I did another photo shoot which was based on an idea I had from the song 'Suzanne' by Plan B which tells the story of the tragic murder of one of the 'Camden Ripper's' victims. (See blog post 'my general inspiration..' 03.03.10 for more detail).

I wanted to create a make up look of someone with a serious injury from being gagged, also indicating some of the pain that would have been caused. Inspired by the events that took place by the notorious Camden Ripper I was able to imagine a similar scenario based on what had happened and put my own interpretation on it for the shoot.

In order for me to create a realistic make up I would have to think of all the factors surrounding the circumstances, such as:

- What was he gagged with?

A thick piece of material soaked in acid, secured on extremely tightly with rubber bands making sure that the acid soaks into his flesh. He was in excruciating pain and in shock. Therefore I have paled his face down using White Mac full coverage as it's thick but not too heavy knowing that it would show, as the lighting used was quite soft. There would be bruising under his eyes from lack of sleep and stress which I have subtly applied using a bruise wheel as I didn't want it to be too obvious. The main focus is on the mouth. The tightness of the gag would have broken the skin and caused the blood to be mixed with the third degree burn from the acid. The flesh would have turned purple around the mouth from a lack of blood circulation, and bruising. I created this by:

1. Painting an outline by blending in a fine line of red greasepaint, to make it look even and precise before I applied the scar make up. I then applied tuplast with a hairpin to the outline, layering it and making it tacky so that it created a raised and jagged mark. If it was applied in a straight line it would look too neat and unrealistic. I applied it using a patting technique with a hairpin to give it a textural definition which will look like raised flesh. I then blended some of the edges with rigid collodion which stretches the skin to make it look like the flesh has been eroded away from the effects of acid and the gag.
2. Colouring in the textural areas with red, and two shades of purple to create the first layer of the aggravated skin. I used these light tones of red as it would have been a fresh wound and I combined this with a small amount of reddy purple and a darker purple for definition, slight bruising that would occur and the illusion of a deeper wound. After experimenting before hand I decided that greasepaint works well on this sort of surface as it sticks well without smudging.
3. Applying wound filler to small areas of tuplast especially in the cracks and under some of the picked up tuplast will create that burnt eroded away effect. I have chosen wound filler purely because it is a perfect red tone for the type of prosthetic I am creating. It looks realistic as it clumps together in a dark red ball of bloody flesh. I then coloured in some more dark purple to look like the wound is deep and added some fresh scratch around the edges with a stipple sponge to blend the blood and redness of the mark. Making it so its not one straight line cut which it wouldn't be as the material used would be rigid.

4. Lastly, by adding congealed blood. I tested 4 different bloods before to make sure I had the right consistency. Such as pro blood - which was too runny. Charles Fox branded blood - too brighter red it looked more orangey. Ben Nye's blood - which was again not thick enough and looked too ketchup like. Congealed blood - which worked the best, it was thick dark red blood which looked the most effective as it stayed put but still kept its freshness.


(experimenting with bloods before hand)


5. To finish I added a little bruising around the lips and corners of the mouth where the gag would have been pulled so tightly. I also dabbed some tuplast onto the lips to create chapping. Which would also occur due to dryness from the gag.

What is the scenario?

I have mentioned above what had happened for this massive wound to appear. The victim has already ripped off the acid gag and the image shows him aggressively pulling the elastic to free himself completely he is blind with rage.

The shadow created in the background was created by mistake but I thought it looked extremely effective so decided to keep it in.. It creates a tense mood and atmosphere, and reminded me of the film 'Psycho' by Alfred Hitchcock.


Thursday 8 April 2010

Tim Burton's Alice in Wonderland....

I went to see Tim Burton's 'Alice and Wonderland' at the weekend. The make up was absolutely amazing and has been inspirational!

Twenty eight people worked in the make up department on this film. All the main characters were made up with outrageous and impressive make up designs. They are all highly editorial, using wigs, contact lenses and prosthetic pieces, for example six of the characters had oversized prosthetic features, such as: 'the woman with a large nose', 'the woman with big ears', 'the woman with a large poitrine', 'the man with a large stomach', 'the man with a large chin' and 'the man with a big forehead'.

The red queen had a unique look that took at least a couple of hours every day to complete. The wig sits at the back of her head, showing a receding hairline, and Helen Bonham Carter had to have a bald cap, that got rid of her natural hairline this then had to be coloured over, followed by her make up. The big wig went on last. After researching this character, I have been able to relate it to the bloody zombie shoot as I wasn't entirely happy with the way the blood didn't extended into the hair. From looking at this character I realise I could have used some of the methods and techniques used to disguise the hairline, and apply it to the 'bloody zombie' shoot. This is something that I can consider in future. Although I haven't learnt properly how to apply bald caps, they're used so frequently in TV and film, I will have to understand the process and will need training.


I have aspired to all the bright colours he has used in the characters especially on Johnny Depp as the Mad Hatter. I loved the bright fluorescent green contact lenses and his contrasting bright orange hair. The gap in his teeth, white face and different shades of pink under his eyes, cheeks and mouth culminates in a freaky, interpretation of the storybook character. With regard to the lenses, I have used white lenses widely in my shoots, and also my trailer. Like Tim Burton, I feel that the changing of the eye ball gives another dimension to a character. In Alice In Wonderland it adds to the zany, wild, fantasy character of the Mad Hatter; in my zombie shoots and trailer they add an eerie quality that takes the viewer out of real life into a nightmare scenario.


The White Queen played by Anne Hathaway, is the most literal in terms of make up. She has given me an idea of what I want to achieve in my next photo shoot (see Renaissance). I like how the White Queen has extremely pale skin, almost white, but her eyebrows remain dark with dark red lipstick. The white face and red lips show the innocence of someone sheltered from the real world. I want to recreate this ethereal look and try and keep the naivete of the White Queen and apply it to an editorial design in keeping with my project.